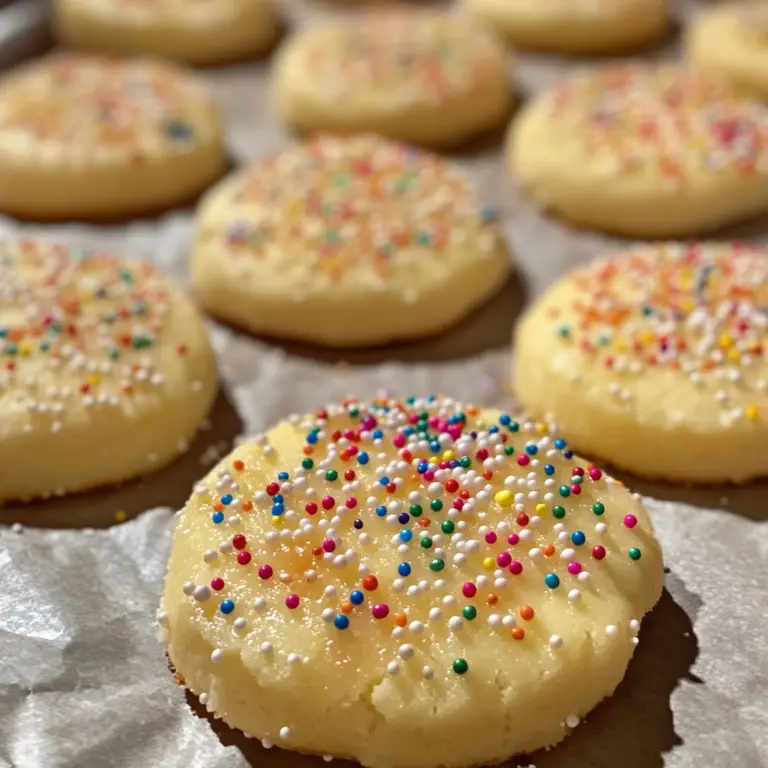
Butter cookies have a universal appeal, but Norwegian Butter Cookies, also known as “Smørkaker,” bring a special touch of Scandinavian warmth and tradition to the table. These cookies, with their rich, buttery flavor and delicate texture, are a perfect treat for holidays, special occasions, or just a cozy afternoon snack. Whether you’re an experienced baker or a novice in the kitchen, this recipe is simple to follow and yields delicious results every time.
Who Is This Recipe For?
This Norwegian Butter Cookie recipe is perfect for anyone who loves the comforting taste of homemade cookies. If you’re looking for a recipe that’s both simple and sophisticated, these cookies are a great choice. Their melt-in-your-mouth texture and customizable decoration options make them ideal for holiday baking, gift-giving, or even a fun baking project with kids. These cookies also store well, making them a convenient option to prepare in advance for gatherings or as a delightful treat to enjoy throughout the week.
Why You’ll Love This Recipe
- Easy to Make: With just a few basic ingredients and simple steps, these cookies come together quickly.
- Versatile: The dough is a perfect canvas for creativity. Decorate them with sprinkles, coarse sugar, or leave them plain for a classic look.
- Perfect for Gifting: These cookies package beautifully and make a thoughtful, homemade gift.
- Great for Any Occasion: From holiday baking to everyday treats, these cookies fit any occasion.
Ingredients You’ll Need
- Unsalted Butter: The star of the show, providing rich flavor and a tender texture.
- Granulated Sugar: Sweetens the cookies and helps to create that perfect golden edge.
- Egg: Adds structure and helps to bind the dough together.
- Vanilla Extract: Adds a subtle, warm flavor that complements the buttery richness.
- All-Purpose Flour: The foundation of the cookie, giving it shape and texture.
- Baking Powder: Provides a slight rise, ensuring the cookies are light and tender.
- Salt: Enhances the flavors and balances the sweetness.
- Optional Decorations: Colored sprinkles or coarse sugar add a festive touch.
Kitchen Equipment Needed
- Mixing Bowls: One for the wet ingredients and one for the dry ingredients.
- Electric Mixer: A hand mixer or stand mixer works best for creaming the butter and sugar.
- Measuring Cups and Spoons: Ensure accurate measurement of ingredients.
- Baking Sheet: For baking the cookies.
- Parchment Paper: Prevents the cookies from sticking and makes cleanup easy.
- Cooling Rack: Allows the cookies to cool evenly.
Step-by-Step Directions
1. Preheat Your Oven
Start by preheating your oven to 350°F (175°C). This ensures that your oven is at the right temperature when your dough is ready.
2. Prepare the Baking Sheet
Line a baking sheet with parchment paper. This not only prevents sticking but also makes for easy cleanup.
3. Cream the Butter and Sugar
In a large mixing bowl, cream together the softened butter and granulated sugar until the mixture is light and fluffy. This usually takes about 3-5 minutes with an electric mixer.
4. Add the Egg and Vanilla
Beat in the egg and vanilla extract until well combined. This adds richness and flavor to the dough.
5. Mix the Dry Ingredients
In a separate bowl, whisk together the flour, baking powder, and salt. Gradually add this to the butter mixture, mixing until just combined. Be careful not to overmix, as this can make the cookies tough.
6. Shape the Cookies
Roll the dough into 1-inch balls and place them on the prepared baking sheet. Flatten each ball slightly with the bottom of a glass or your hand. If desired, decorate the cookies with colored sprinkles or coarse sugar.
7. Bake
Bake the cookies for 12-15 minutes, or until the edges are lightly golden. Keep an eye on them, as they can go from perfectly golden to overbaked quickly.
8. Cool
Allow the cookies to cool on the baking sheet for a few minutes before transferring them to a wire rack to cool completely. This helps them firm up and ensures they don’t break apart when moved.
Tips and Variations
- Flavor Variations: For a twist, try adding a teaspoon of almond extract or a pinch of cinnamon to the dough.
- Texture Change: If you prefer a crisper cookie, roll the dough thinner before baking.
- Decorating Ideas: These cookies are perfect for decorating. Use royal icing, melted chocolate, or even a dusting of powdered sugar to add a festive touch.
- Make-Ahead Tip: The dough can be made ahead of time and refrigerated for up to 3 days. Just bring it to room temperature before shaping and baking.
How to Store Norwegian Butter Cookies
These cookies store wonderfully, making them perfect for making ahead of time. Place them in an airtight container at room temperature for up to a week. If you’d like to keep them longer, they freeze well too. Simply layer them between sheets of wax paper in a freezer-safe container, and they’ll last for up to 3 months. When you’re ready to enjoy, thaw them at room temperature, and they’ll taste just as fresh as the day you baked them.
Suggested Pairings
Norwegian Butter Cookies are delightful on their own, but they also pair well with a variety of beverages:
- Coffee or Espresso: The rich, buttery flavor of the cookies complements the boldness of coffee.
- Tea: Enjoy these cookies with a cup of Earl Grey or chamomile for a calming treat.
- Milk: A classic choice that highlights the sweetness of the cookies.
FAQ
Can I use salted butter instead of unsalted butter?
Yes, you can, but be sure to reduce the added salt in the recipe by half to prevent the cookies from being too salty.
Can I make the dough ahead of time?
Absolutely! The dough can be refrigerated for up to 3 days. Just let it come to room temperature before baking.
Why did my cookies spread too much?
This can happen if the butter is too soft or if the dough is overmixed. Chilling the dough for about 30 minutes before baking can help prevent spreading.
Can I freeze the cookies?
Yes, these cookies freeze beautifully. Just be sure to store them in an airtight container with layers of wax paper between them to prevent sticking.
Conclusion
Norwegian Butter Cookies are a timeless treat that brings a taste of tradition and comfort into your home. Whether you’re making them for a holiday celebration, a special gift, or just because, these cookies are sure to impress. They’re easy to make, versatile, and delicious, making them a perfect addition to your baking repertoire.
If you loved this recipe, be sure to share it with your friends and family! Don’t forget to subscribe to our blog for more delicious recipes and baking tips. Happy baking!


